Step 3: Security
It may take a few minutes for the cluster to be created. When it is done, you will see the following screen.
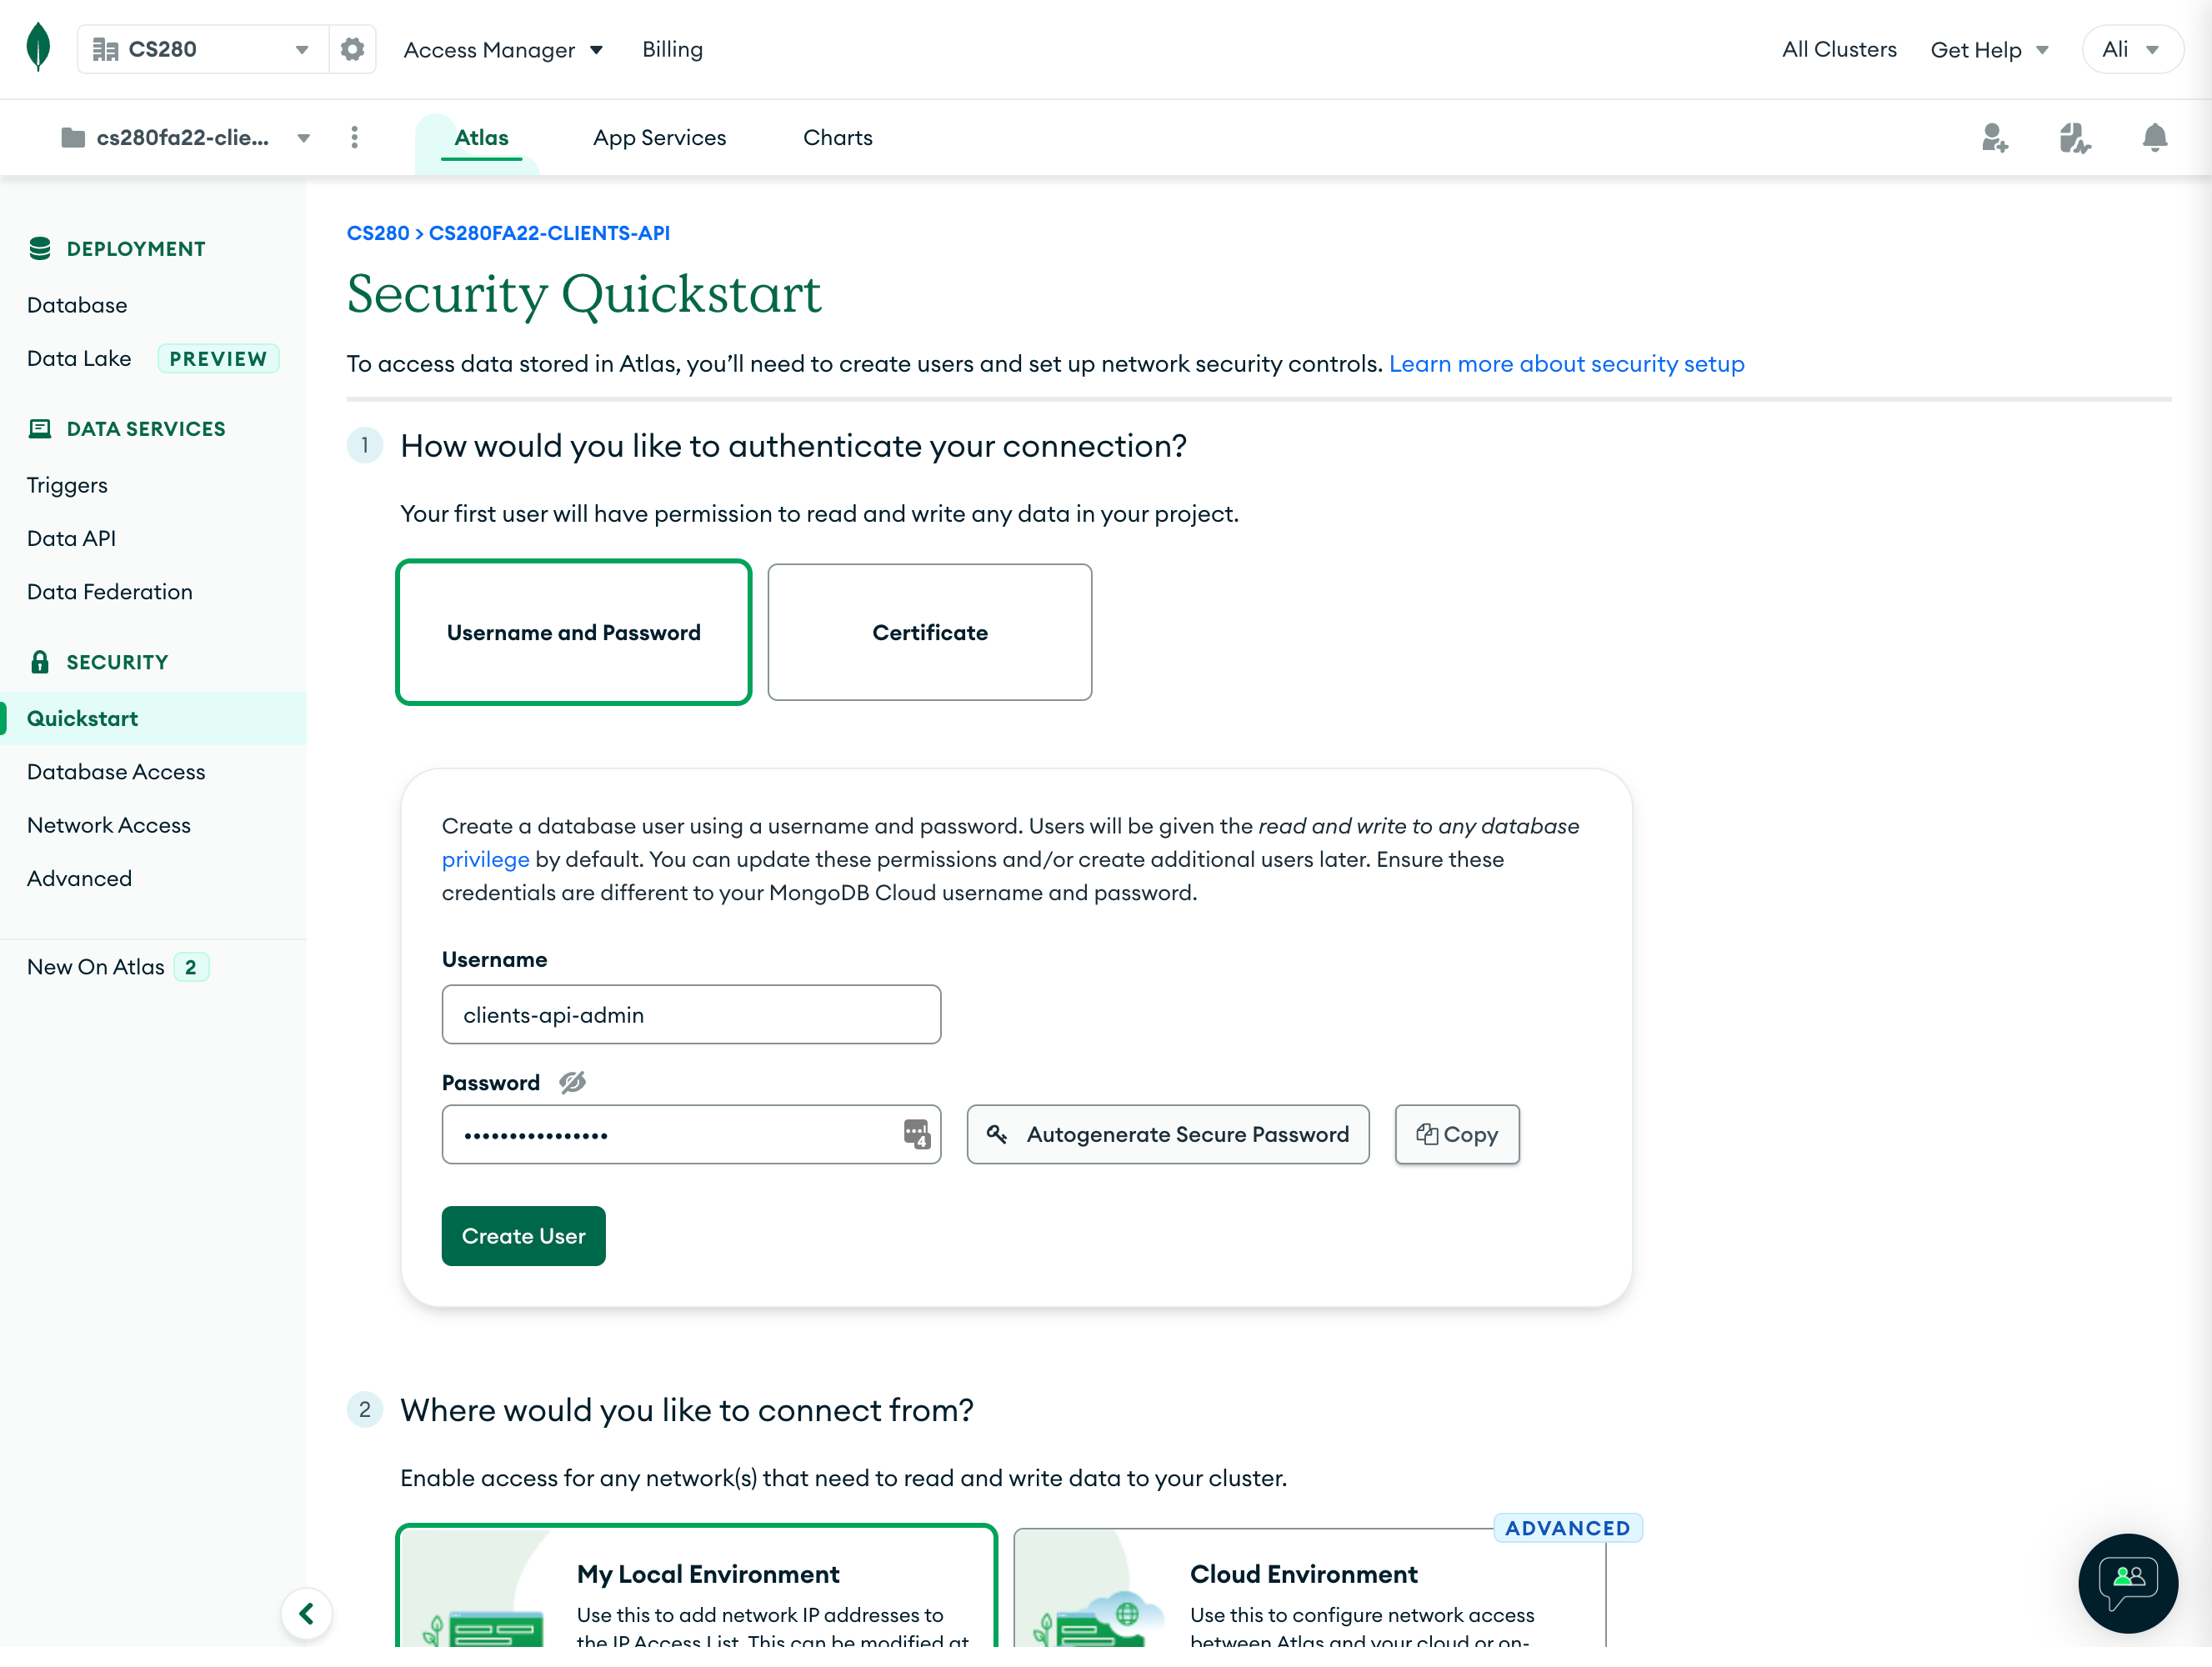
We now need to create at least one "user" and provide it with permissions to connect to our database. Here, "user" means the developer (i.e., you) and not the end-user of your product. You can create multiple users with different functional roles/permissions.
- Select “Username and Password” as the authentication method.
- Provide a username and password! I've chosen the username
clients-api-admin(as I was building this cluster for HW7) and auto-generated a secure password. (Make sure to copy the password as you will need it later!)
Scroll down to see the “Where would you like to connect from?” prompt!
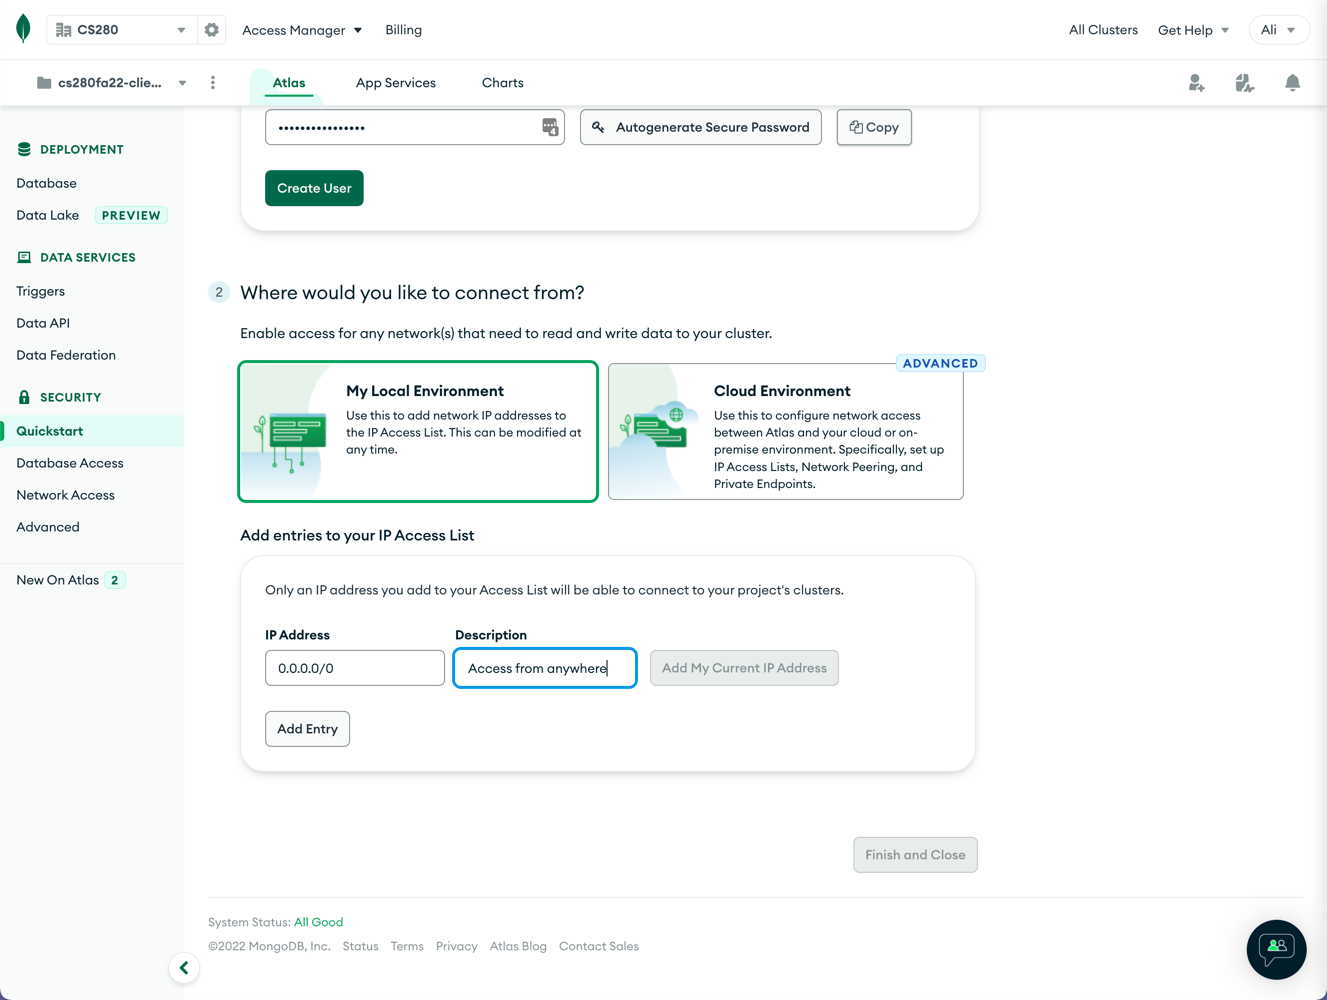
As an extra layer of security, you can restrict access to your cloud database by selectively allowing/prohibiting specific IP addresses. We are going to let access from any IP address! This setting does not mean that everyone will have access to our database! Only the database "users" will have access, but they can do so from anywhere. Of course, our users need to be authenticated using their passwords).
Ass IP Address of 0.0.0.0/0 with the description “Access from anywhere”.
Confirm your selections by clicking on the “Finish and Close” button.